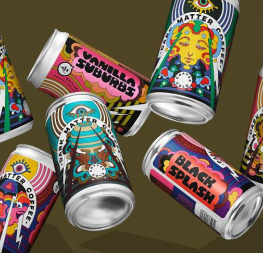
Multiple steps are required to turn plastic film and paperboard into a carton used to advertise, hold, protect, and transport the product that is being sold. While many different carton types exist with many different manufacturing processes, the focus will be specifically on high volume beverage can cartons, such as a beer carton (Image 1). Many quality audits exist throughout each process, but will not be discussed.

Image 1: Schaefer beer carton. https://commons.wikimedia.org/wiki/File:Schaefer_beer_case.jpg
Beverage can cartons can come in many different sizes and shapes, but the basic steps of manufacturing are the same. These steps involve printing, metalizing, laminating, cutting, and gluing. During these steps, the plastic film and paperboard are converted into a final packaging ready to be filled with product. These carton manufacturing processes have been around for many years with minor changes.
Printing
A carton design is submitted and agreed upon for manufacturability by the customer and manufacturer. Samples may be requested to test the design and manufacturability. The design that will be printed onto the film will have side-by-side repeats of the design on the machine’s roller to optimize the roll width and reduce scrap. A large roll of polypropolene, polyetheline, or another suitable film material is used in a gravure print press (Image 2). The print is applied to the reverse side of the film to protect the artwork and prevent scratches while in use.

Image 2. BOBST Gravure Press used to print onto film. https://www.bobst.com/usen/products/gravure-printing/gravure-printing-presses/overview/machine/expert-rs-6003/
A gravure press is a multi-cylinder machine that applies ink to the film one color at a time. Each cylinder is etched with a specific pattern that captures the ink onto the roller and transfers the specific design onto the film. The film goes through a heater after each color is applied to ensure the paint is dried on the film. A lacquer clear coat is added to the last cylinder to provide a surface for the aluminum film to adhere to and provide protection to the film. The film is rolled up for the metalizing and/or lamination process.
Metalizing
Some cartons seek a metallic look and protection from the elements. This is accomplished with a vacuum metallizer machine (Image 3). This machine utilizes a vacuum and allows a very thin coating of aluminum to be applied onto the film. This is accomplished by heating aluminum wire until it condenses to the film as it passes. The film is rolled up for the next operation.

Image 3: BOBST Metallizer used to apply aluminum onto the flim. https://www.bobst.com/usen/products/vacuum-metallizing/vacuum-metallizers/overview/machine/k4000-crucible/
Lamination
The film has little strength without being mounted to a substrate. Using paperboard as the substrate will provide rigidity and protection to the carton. The printed film is loaded into the laminator (Image 4) along with a large roll of paperboard as the substrate.

Image 4: BOBST Laminator used to bond the film to the paperboard. https://www.bobst.com/fileadmin/_processed_/c/2/csm_NOVA_D800_LAMINATOR_01_5f6ad9ae1b.png
An even layer of melted resin is applied between the film and paperboard. The film and paperboard are compressed in a wet bonding process to combine the two different materials. Driers are used to dry the resin before it is rolled up for the cutting operation.
Cutting
The laminated cardboard roll is cut from the large roll and separated into individual cartons. The laminated roll is put into a cutting machine (Image 5). To align the carton roll with the cutter, special imaging software reads barcodes that were printed in a void area on the roll. This barcode ensures the paperboard is in the correct position relative to the cutter.
The carton is stamped using a custom metal printing die designed to cut, score, and emboss the carton. The cutting die is made using the steel rule for cutting and perforating. Between the steel rule, foam pads are added to ensure the carton does not stick to the die while being stamped. As the cartons are stamped from the master roll, the scraps are removed leaving only the finished flat carton. The flat cartons are stacked onto a pallet for the gluing process. In more automated facilities, flat cartons may go from cutter to gluing providing improved production efficiency.

Image 5: BOBST Cutter used to cut the cartons from the master roll. https://www.bobst.com/fileadmin/user_upload/Products/PG_Folding-gluing/2019/EXPERTCUT_106_LER_PER/EXPERTCUT_106_PER_Overview.png
Gluing
To transform the carton from a flat sheet into a 3D-shaped carton, the sealing/gluing machine is used (Image 6). This is a long machine that consists of a carton feeder, folding area, gluer, stacker, and may include a packing station at the end of the line. The gluer is the final step in converting the carton into its final shape.

Image 6: BOBST Gluer used to fold and glue the carton. https://www.bobst.com/fileadmin/_processed_/0/e/csm_AMBITION_50-106_Overview_6949f1b40e.png
A stack of flat cartons is stacked into a carton feeder. The carton feeder allows for a buffer to be achieved to ensure the line runs at capacity. One carton at a time is transported down the machine using rubber belts with a minimum gap between cartons. Rollers and guides are custom positioned to put bends into the carton along pre-creased lines create during the cutting operation. Multiple bends are often needed to achieve the final shape of the finished carton.
The carton needs to be glued together to form the final product. A fast dry adhesive is added to the carton edge to allow the carton to obtain its three-dimensional shape. Rollers are positioned to put pressure on the seam to ensure a proper bond. Once the carton is glued, the cartons are boxed and palletized for shipping to the filler plant. The gluing operation is sometimes done at the filler plant due to filling constraints.
Conclusion
Overall, carton manufacturing has changed little over the years. While the manufacturing processes have gotten faster and produce less scrap, the basic steps of printing, metalizing, laminating, cutting, and gluing are the same in producing a beverage can carton for a high-volume demand. These processes will continue to be improved as the need for beverage packaging demand increases.
References
Luminite. (2018). Flexo Printing vs Gravure Printing: Pros and Cons. Retrieved from: https://blog.luminite.com/blog/flexo-printing-vs-gravure-printing
Norwood, Rick. Interview. By Bobby Norwood. 10/20/2021
BOBST. (2020). Folding-Gluing Process. Retrieved from: https://www.bobst.com/usen/products/folding-gluing/process/
(2019). Understanding the Steel Die Cutting Process for Packaging. Retrieved from:
https://blog.boxmaker.com/steel-die-cut
Walter Soroka. (2002). Fundamentals of Packaging Technology-Third Edition


